
In my previous post, I talked about replacing the various circular fluorescent tubes in my house over to LEDs. In this post, I’ll cover the replacement of short, straight T5 fluorescent tubes and discuss the interesting results I had in this space.
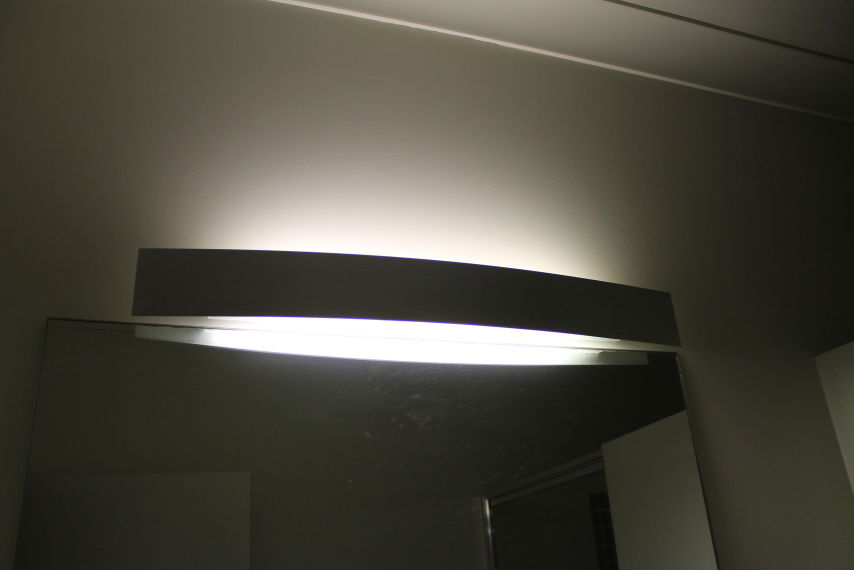
In my house, I have a total of just two of these T5 tubes, both positioned above the sinks in my respective bathrooms. They’re positioned inside a housing that essentially acts as recessed lighting, reflecting light from the tube out in all directions.
Replacement lights
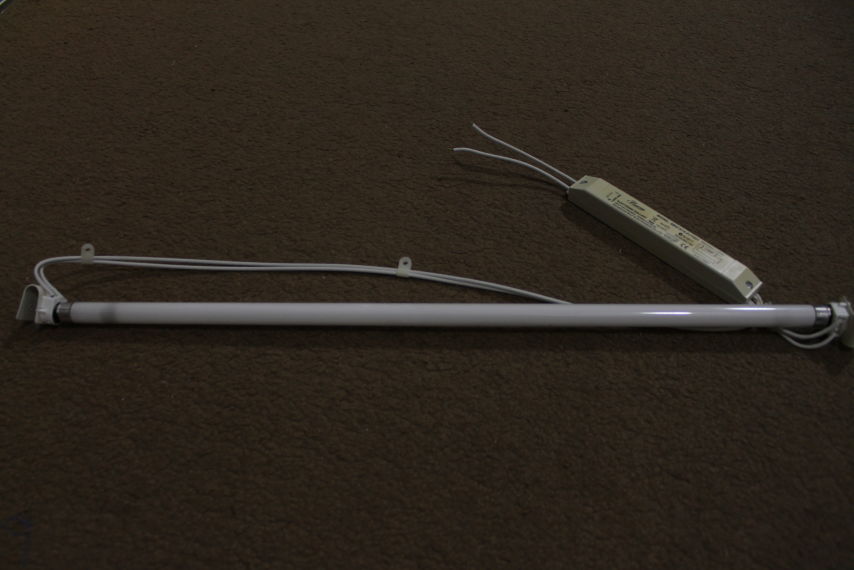
- 2 x 16W straight LED panels: Cost $10.00 US each on AliExpress
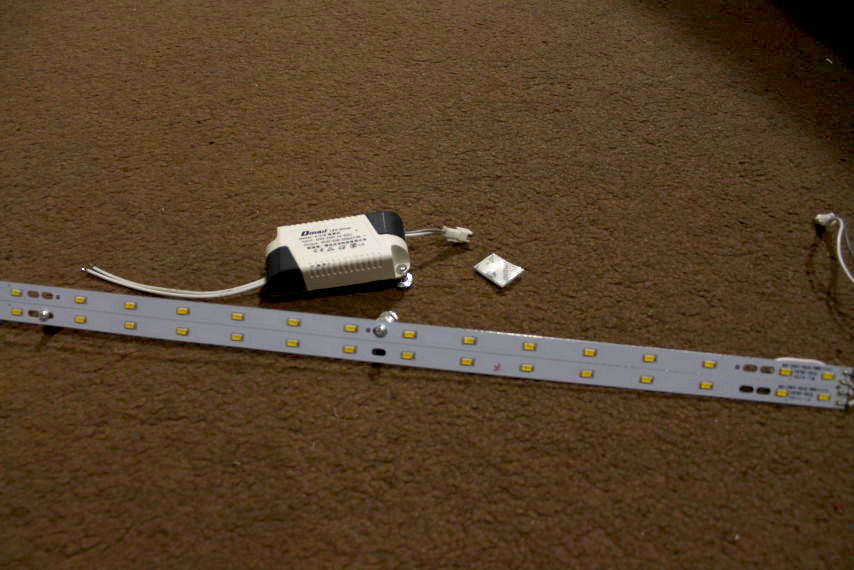
These were the closest direct replacements for T5 tubes I could find, given their dimensions roughly matched the housing and original tube size. The options were quite limited, which is why I ended up having to pay quite a lot more for these panels than the previous lights I’d purchased.
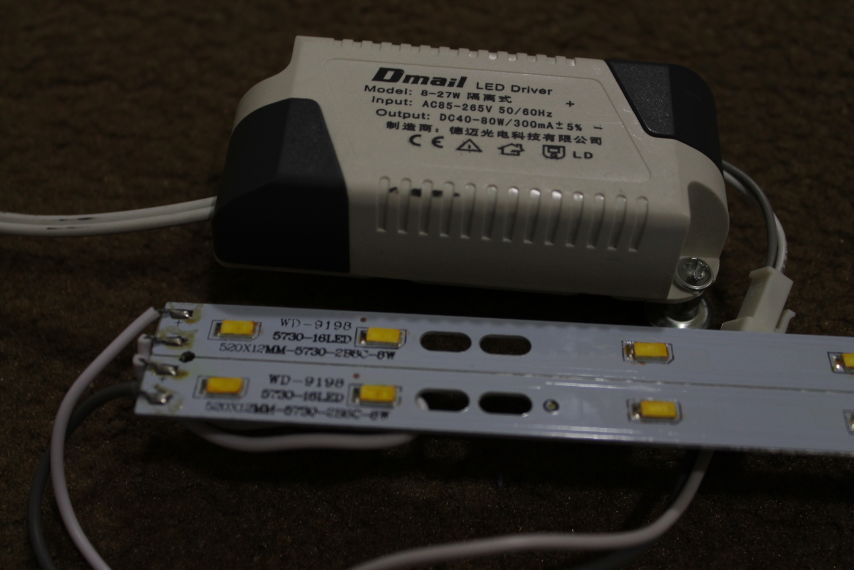
The replacement LED panels come with a driver for connecting the mains power to the lights, and the driver accepts worldwide AC voltage. The page lists the wattage as “15W” under ordering, but is actually 16W.
The page lists the option of a warm white colour, but in actuality, you can only pick plain “white”. As it transpires, the colour of these LEDs was initially quite disappointing, being essentially purple or pink, with a very high concentration of red. Oddly, trying to take a photo of this issue wasn’t possible, I presume due to some sort of filtering cameras do.
In time, the light colour moved back towards more of a cool white, perhaps as the LEDs burn themselves in. However, it still wasn’t perfect, so to improve the colour, I’ve taken to using a yellow marker in order to filter out some of the red and most of the blue in the light, and roughly restore the light to a “natural white”, like it was supposed to be the in the first place.
How to
This is essentially the same as the previous post, so refer to that page for greater detail.
Preparation
Since the fixture is quite a lot smaller, check that the size of the panel being purchased will fit; this is understandably critical! In my case, I measured the size of the light fitting and took into account the small amount of extra space to be gained by removing the old fluorescent starter and tube holder.
Gather the materials, order the lights, and wait. Make nice with your electrician friend and arrange for them to come over and help out when your lights arrive.
Step by step
Your experience will likely be different, so adapt the instructions to suit your own light fittings.
Fit the magnetic mounts to the LED boards, or for non-ferrous fittings, fit Velcro.
Ensure all power is disconnected from the light fitting prior to beginning. Isolate the circuit the light is connected to, and use a multimeter to double-check the voltage before starting.
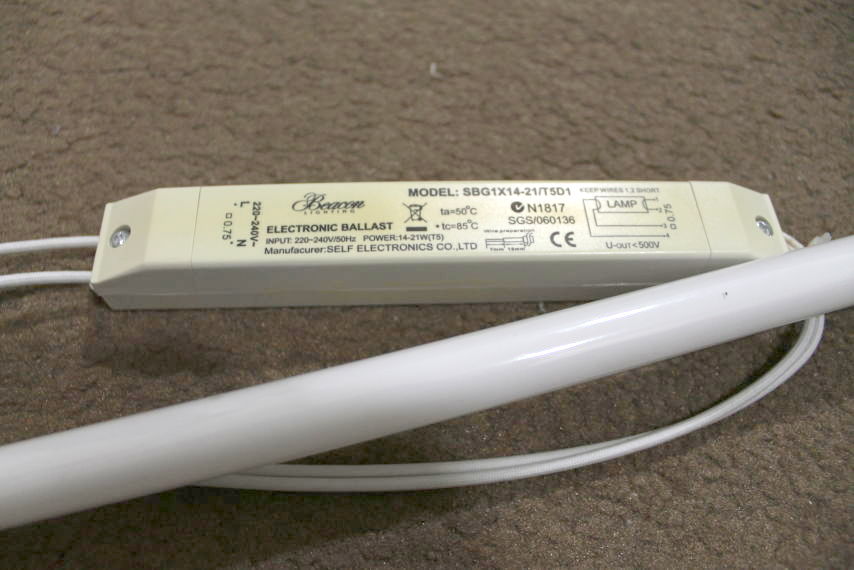
Unscrew and remove all electrical components from the panel. In this case, one would remove the tube, the tube connectors, the electronic ballast, and all other fittings.
All that should remain in the fitting is the mains cable entering the terminal block.
Fit the LED board, driver and cabling into the light fixture. This may require some crafty routing of cables, depending on the size of your light fitting and the space available.
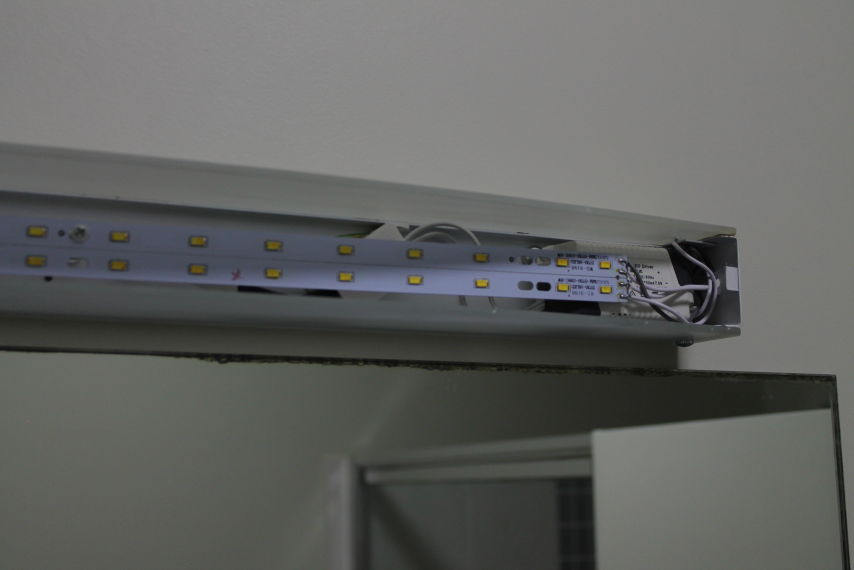
Wire the active and neutral wires into the correct part of the terminal block, and ensure all screws are secure. Note that the earth is already connected as part of the light fitting itself.
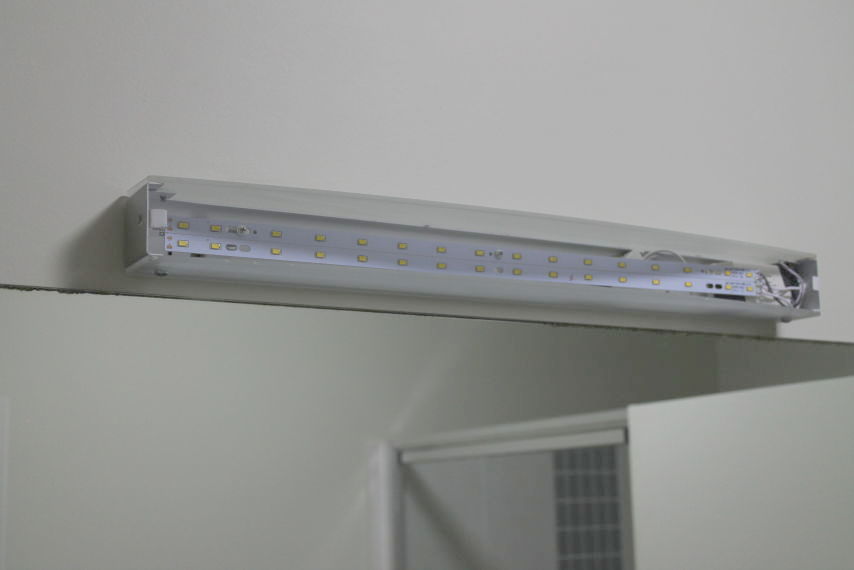
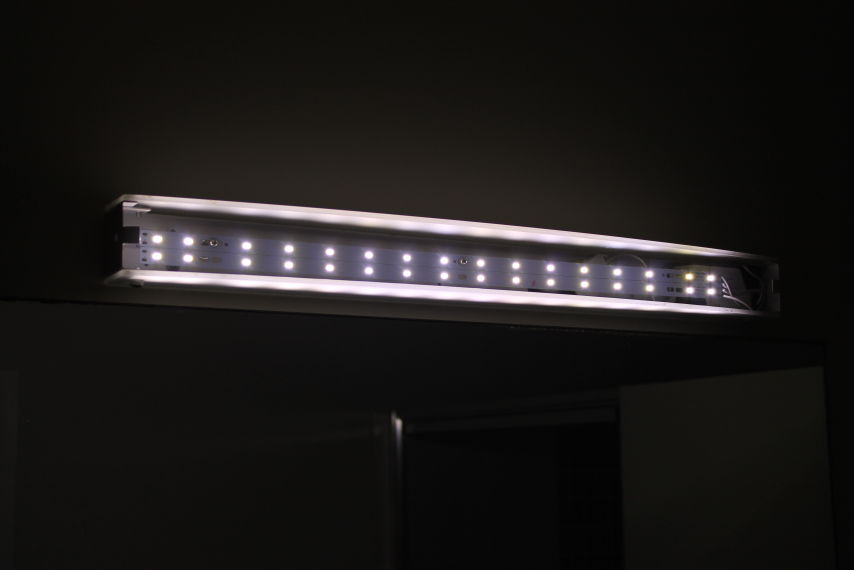
The end result looks like this:
Turn the power back on, and turn on the light switch.
Repeat for other lights being replaced.
Power comparison
| Type | Power rating | Brand | Watts | Power Factor | Amps |
|---|---|---|---|---|---|
| Fluoro | 14W T5 | Beacon Lighting | 9.23 | 0.53 | 0.07 |
| LED | 16W | Generic | 4.78 | 0.32 | 0.06 |
As per my previous post, the figures above aren’t exactly brimming with precision. The power meter I was using monitors amps to 2 decimal places only (and the reading tends to jump around a bit). From some of the calculations I’ve done, these figures aren’t even rounded, they’re just truncated. I’ve worked backwards using the voltage, amperage, and power factor to get a truer indication as to the wattage. The input power I’m working with is slightly variable as well, being between 246 and 250V AC.
The comparison between the two lights isn’t exactly fair or exact. The LED panel replacement is a lot brighter than the fluorescent tube, but the fitting I’m putting the LEDs into is really designed for the 360-degree nature of a fluorescent tube. The LEDs have less than 180-degrees of light emission and results in some of their light being ‘trapped’ in the fitting.
As you can see above, the energy savings aren’t as nearly as dramatic as last time. In this case, the current draw from both types of lights is very close to the same (0.07A compared to 0.06A). When you consider the accuracy of my power meter, then this is probably almost statistically irrelevant.
Conclusion
Overall, this replacement, whilst successful, hasn’t been as ground-breaking as the previous circular fluorescent replacement. There will always be the environmental benefits of not using mercury lamps and (hopefully) not having to replace the lights ever again.
The power savings are slight, but not nearly as significant as before. I would take an educated guess as to it being a combination of the following:
- Unsuitable light fitting, requiring a higher power of LED to achieve a suitable brightness.
- Higher efficiency of the original T5 tubes compared to circular fluorescent tubes
- Lack of efficiency of these new LED panels
The first point is probably the most notable. Last time, with the circular LEDs, the light fittings are purely mono-directional: downwards. This means that the fluorescent tubes are essentially wasting power with their 360-degree light emission around the circular tube, with light being emitted onto surfaces inside the fitting that aren’t directly seen. By contrast, the circular LEDs purely output light downwards onto the diffuser cover, and out into the room. This stands to be more efficient, requiring less overall light, and thus less power, meaning a lower-power LED panel can equate to a higher wattage of a fluorescent tube.
As you can see above, in the straight fitting, the light escapes from the top and bottom, passing through slightly frosted glass. With the original T5 tube emitting 360 degrees of light, a lot of this light directly escapes the fitting, with a small proportion reflecting off the front cover. The LED panel replacements only output light in a forward direction, with most light relying on reflection against the front cover in order to escapes into the room. As a result, it is going to take a greater amount of light and power to produce roughly the same light output.
The cost of LEDs is significant in this case and whilst financial riches aren’t going to be gained from the power savings, the capital outlay should be paid back eventually, since a replacement T5 tube costs just shy of $7 AUD.
Stay tuned for more of the same as the remainder of the house gets converted to LEDs and made more efficient!
comments powered by Disqus