This is the first in a series of ways I’m looking to reduce my environmental impact at home, and save a significant amount of money at the same time. Over the course of my Project ‘Green’ House posts, I aim to look at extremely cost-effective ways of reducing your carbon footprint, improving your power bill, and generally making life easier at home. Feel free to adopt any of my ideas for your own uses - I’d love to hear if this has helped you.
This first post is about my aim to replace all the lights in my house with energy and cost efficient alternatives to standard fluorescent tubes. Whilst these lamps are more efficient than standard filament light bulbs and far more efficient than any halogen bulbs (such as downlights), they still require mercury, take a while to start up, and aren’t as energy efficient as LEDs.
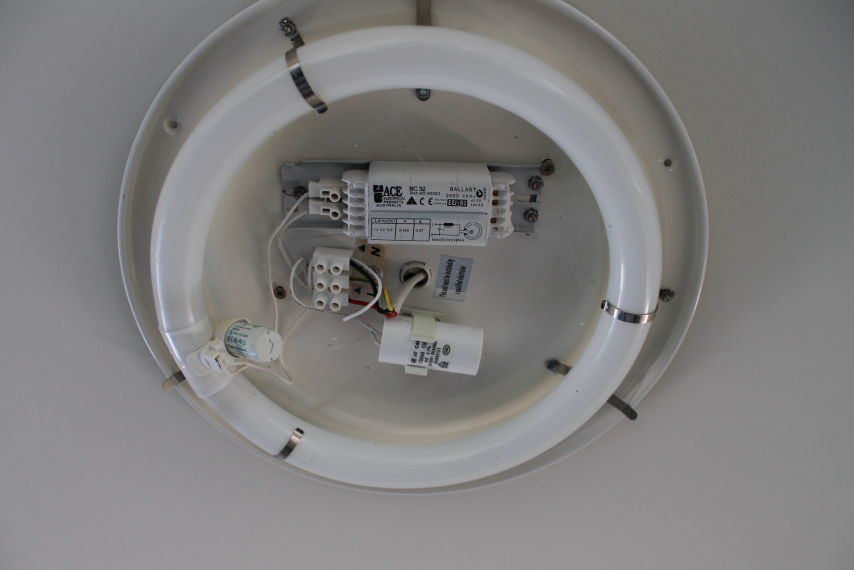
So far, I’ve had success with changing over the most frequently-used lights in my house — the circular fluorescent tubes. In my house, these lights are attached to the ceiling (rather than recessed), have an off-white dome cover over them as a diffuser, and aren’t the easiest of things to the replace. This is especially true for many of my lights, which sit at least 3.6 metres off the level, due to the height of my ceiling in the stairway and bedroom. This is not something I really want to have to change!
Add into the mix that a replacement 32 watt circular tube is $10 AUD, a fluorescent starter is around $1.50 each, plus the time, fuel and energy required to get these, and making the switch to LEDs, which should hopefully never need replacing, becomes a sensible solution.
Materials
Things I needed to get started were:
- LED replacement lights, drivers, magnets for fitting (see below)
- Tools for removing old fluorescent electronics (screwdrivers, spanners)
- Qualified electrician friend to do wiring for you (in Australia, anyway)
- Ladder
- Multimeter
- Velcro (if ceiling plates are not steel)
Replacement lights
Note
Update: The prices have increased significantly since I ordered my LED lights and postage is now being charged by this seller. There will be other sellers that offer cheaper prices if you take the time to look.
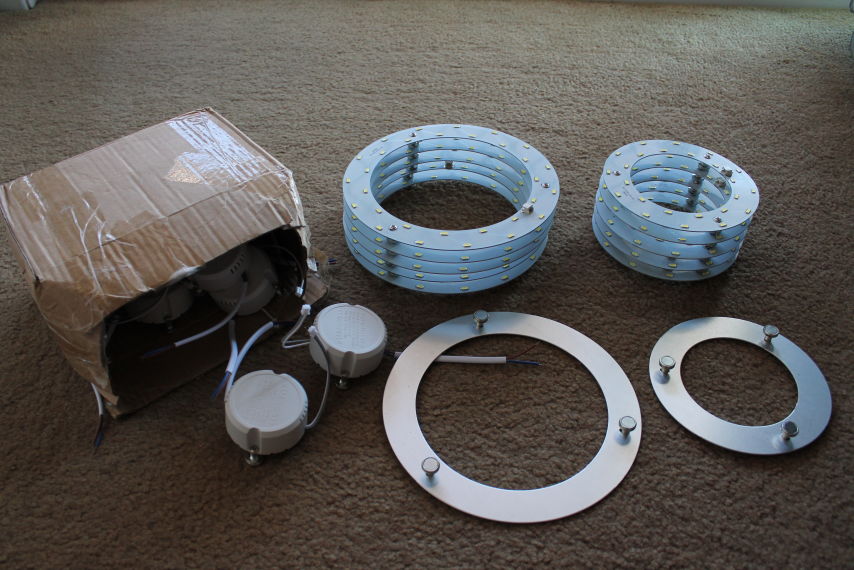
- 8 x 15W circular LED ceiling panel (replaces 32W fluorescent tube):
- Cost $4.25 US each on AliExpress
- 6 x 12W circular LED ceiling panel (replaces 22W fluorescent tube):
- Cost $3.75 US each on AliExpress
Both of the above replacement LED panels come with LED driver transformers for connecting mains power to the lights and these will fit essentially any mains power source in the world. The LED boards operate at a voltage around 51V, which is provided by a switch-mode regulator (or “LED driver”). Given the range of voltages the driver supports (AC 85V to 277V), the lights will function essentially anywhere in the world. Here, with a supply around 250V, the lights will continue to work perfectly during a brown-out. Not that we have many of them here in this part of Australia, but it has happened twice in recent memory.
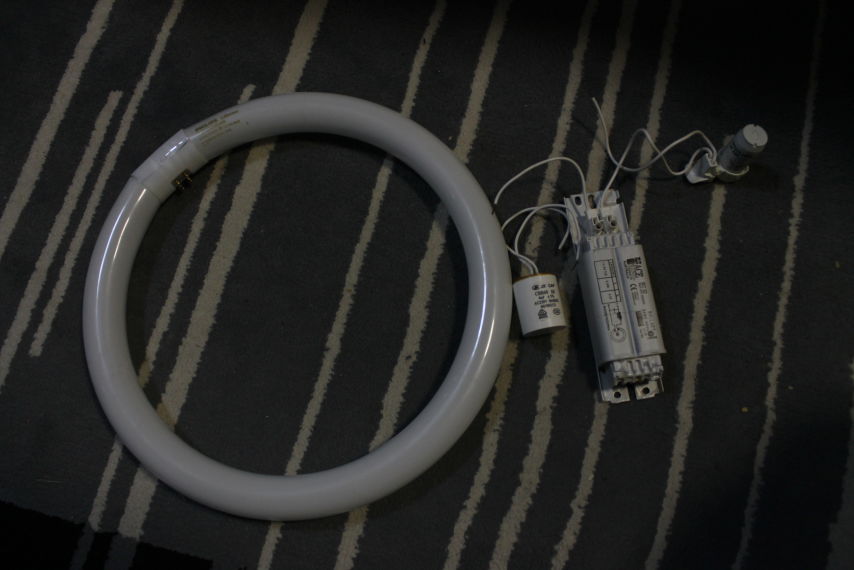
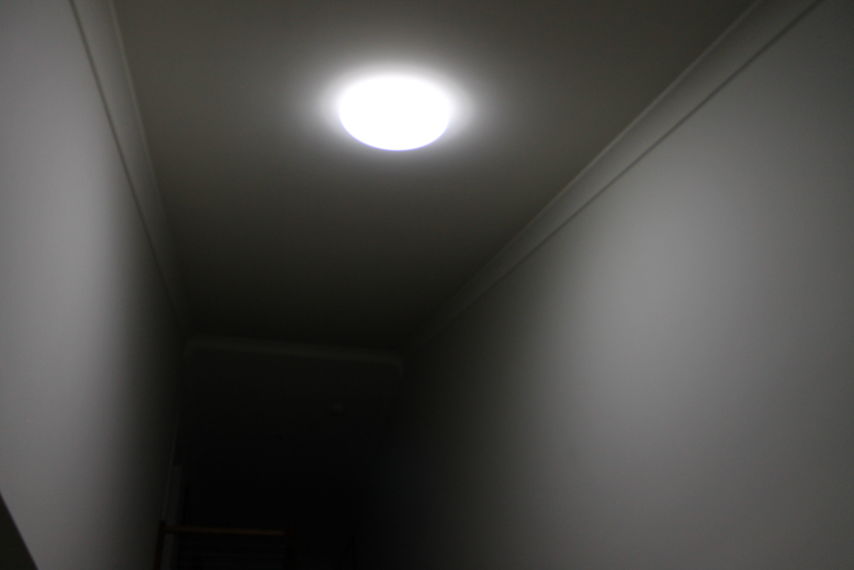
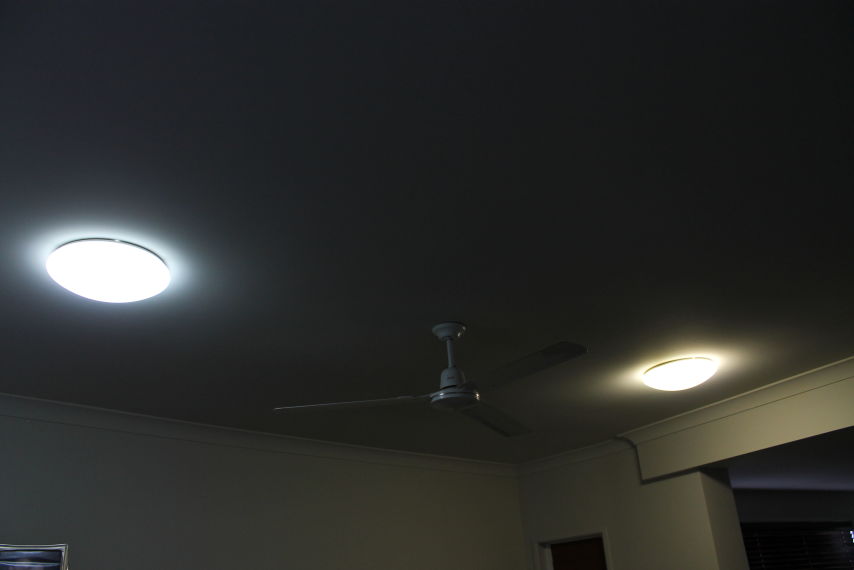
As for colour, I selected cold white (being 6000-6500K in temperature) as my existing lights were “cool white” (being around 5700K). Buying LED lights from overseas is incredibly hit-and-miss and in the past, I’ve found that lights usually end up being a little warmer/yellower than expected. In this case, I was somewhat surprised to find the colour temperature accurate - the replacement lights are a little colder than my original tubes. The price is right though, and I can always “colour in” my LEDs with a little felt-tip marker if required! Here’s a comparison of the LEDs on the left and the original fluorescent tube on the right:
They also come with screw-on magnetic fittings for attaching both the LED panel and driver to any iron or steel-based surfaces — particularly, the circular plates already on the ceiling.
The builders for my house helpfully decided to change from a steel-based plate to an aluminium-based plate for around 40% of the lights. I didn’t discover this until about half-way through the install work. Thankfully, I have industrial-quality Velcro on hand to affix the LED boards to the ceiling. Check all of your light fittings before starting and avoid the surprise, and if using Velcro, make sure it can withstand a little warmth as the LEDs will produce some heat (though not huge amounts).
The size of the replacement boards are notably smaller in diameter than the original tubes. However, after much thinking and reading some web resources, I decided that the given wattage (and lumen rating) of these LED boards would roughly match the original fluorescent tubes. Turns out my approximations were close enough; the LEDs are actually slightly brighter.
How to
Preparation
First comes the preparation. Gather your materials and order your lights. Since they’re coming from China, I had to wait a good 3 weeks for mine to arrive but they made it. Since I’m in Australia, and electrical work should only be carried out by a qualified tradesperson, make sure you’re friends with someone fitting that description.
Be sure to check what the mounting plate on your ceiling - the one that currently holds your fluorescent tube and electronics - is made of. Most of mine are some steel-based metal, meaning that the magnetic clips provided with the boards will work. Some of my other lights are mounted on aluminium-based (non-ferrous) plates, meaning the magnets won’t work. I got a rude awakening to this fact about half way through the installation and had to organise a solution. Industrial Velcro saved the day in this instance.
Step by step
Your experience will likely be different, so adapt the instructions to suit your own light fittings.
Fit the magnetic mounts to the LED boards, or for non-ferrous ceiling panels, fit Velcro.
Ensure all power is disconnected from the light fitting prior to beginning. Isolate the circuit the light is connected to, and use a multimeter to double-check the voltage before starting.
Remove the round diffuser dome from the light.
Remove the connector on the side of the tube, and remove the tube itself. Store the tube safely to prevent it getting broken.
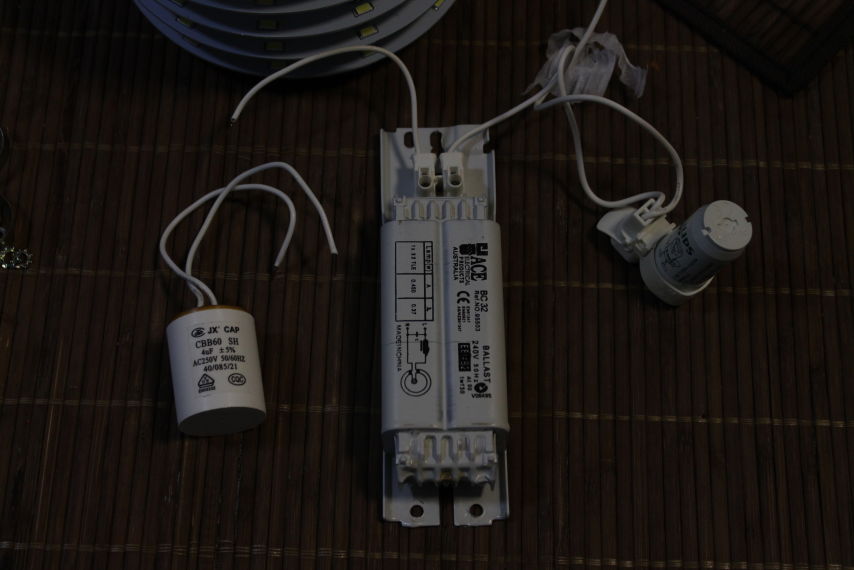
Unscrew the relevant wires in the terminal block to remove the large capacitor at the bottom, the ballast at the top, and the fluorescent tube connector at the left.
Unscrew and remove all electrical components from the panel. All that should be left are the mains cable entering the terminal block.
Fit the LED board and LED driver onto the ceiling panel. Position things according to how the existing cables and terminal block are located. Some of my lights required some crafty positioning.
Take extra care with positioning if using Velcro. Once it’s stuck, it’s stuck. Magnets are easily repositionable, if required.
Wire the active and neutral wires into the correct part of the terminal block, and ensure all screws are secure.
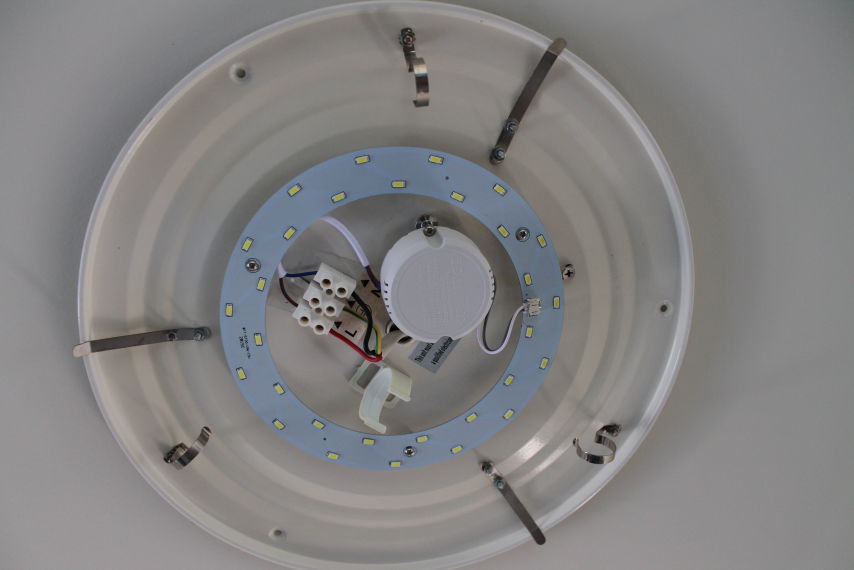
The end result looks like this:
Turn the power back on, and turn on the light switch.
Rinse and repeat for all the remaining lights in the house!
When done, take your old tubes and electrical components to your a local recycler. For me, I was able to drop my left-over parts off at G & G Markwell, a business specialising in second hand building materials. Here’s hoping they won’t just throw the lights away since they do still work!
Power comparison
Prior to installation, the power consumption was measured for the LED lights, and was measured for the fluorescent lights after their removal. Here’s the grand break-down:
| Type | Power rating | Brand | Watts | Power Factor | Amps |
|---|---|---|---|---|---|
| Fluoro | 32W | Lucci | 36.00 | 0.33 | 0.44 |
| Fluoro | 32W | Panasonic/Goodlite | 33.55 | 0.33 | 0.41 |
| Fluoro | 32W | Philips Lifemax | 44.90 | 0.76-0.82 | 0.22 |
| Fluoro | 32W | Hitachi | 40.79 | 0.78 | 0.21 |
| Fluoro | 22W | Lucci | 17.86 | 0.30 | 0.24 |
| Fluoro | 22W | Hitachi | 18.55 | 0.34 | 0.22 |
| Fluoro | 22W | Sylvannia | 18.00 | 0.33 | 0.22 |
| Fluoro | 22W | Philips Lifemax | 17.46 | 0.30-0.34 | 0.22 |
| LED | 15W | Generic | 5.63 | 0.38 | 0.06 |
| LED | 15W | Generic (v2) | 4.46 | 0.30 | 0.06 |
| LED | 12W | Generic | 4.08 | 0.33 | 0.05 |
The figures above aren’t entirely accurate as the power meter I’m using is only monitoring amps to 2 decimal places, and watts to whole numbers. From some of the calculations I’ve done, these figures aren’t even rounded, they’re just truncated. I’ve worked backwards using the voltage, amperage, and power factor to get a truer indication as to the wattage. The input power I’m working with is slightly variable as well, being between 246 and 250V AC.
Note that the power rating is only what’s written on either the fluorescent tube or the LED board and doesn’t factor everything in. For fluoros, the power consumption goes up because of the ballast, and the wattage on the LEDs goes “down” because of the low power factor (so a “15W” board ends up being only 5w of real power).
In any case, it’s clear to see just how little power the LED boards use. In terms of real power (watts), the 15W LED boards use around 87.5% less, and for total power (current in amps) use 72.7% less. When compared to the worst performing 32W fluorescent tube, the usage is 83% lower in watts, and 86.4% lower in terms of total power in amps. Yes, the power factor is lower than most fluorescent tubse I had, but the current draw is significantly smaller — compare 0.06A to 0.22A or 0.44A.
There are similar power savings to be had from the 12W LED boards over their 22W counterparts, consuming around 77% less real power in watts, and 43.2% less total current drawn. Again, compare 0.05A for the LED board to 0.22A for the fluorescent tubes.
The difference between 22W and 32W fluorescent tubes and their respective LED counterparts isn’t as significant as I originally expected, but I’m fairly sure this comes down to the differences in the electronic ballasts being very small.
Benefits
A notable part of the driving force behind me making the switch to LEDs was the fact that these replacement lights were just so incredibly cheap. By contrast, a single 32W fluorescent tube will cost $10 AUD - more than double the cost of the LED panel. For me, a few have needed replacement over the last few years, and quite a few of the old tubes we have were getting ‘sluggish’ to turn on and flickering more recently. When you couple the insignificant cost with the environmental benefits of using far less power and of not using mercury, this feels like a no-brainer to me.
So, the overall benefits are:
- No more replacements needed. Saving on manufacturing energy, materials and chemicals when sourcing replacement tubes, not to mention savings to my time, energy, and safety.
- Cost. For less than half the cost of one replacement tube, the LEDs should last a long time and a lot longer than any one fluorescent tube or starter.
- Resilience. This remains to be seen if they’ll last for the claimed 50000 hours, the boards are designed with each set of 2 LEDs in parallel so if one LED in a pair fails, the lights will stay on. If one LED fails, then it can be replaced for almost nothing save a bit of soldering. My personal thinking is that the rest of the electronics will fail before the LEDs themselves.
- Power savings. The LED replacements for the 32 watt fluorescent tubes use around 75% less power, and the LED boards for the 22 watt fluorescent tubes use around 60% less power. Mileage definitely varies here between brands of fluorescent light and electronics, but on average it’s a great deal less.
- Instant on. No waiting or flickering when the lights turn on.
And now for something completely different…
This little project has been a great way of getting familiar with electricity, power factors, and efficiency in lighting. These LED boards look great and whilst they’re a little colder white than what I had at home originally, they’re brighter and the power savings are significant. Couple this with the fact that each board cost less than half of a replacement fluorescent tube, and it’s win-win — well worth it in becoming a ‘green’ house.
If there are any issues with the LED boards, I’ll report back.
This is the first in my series of ‘green’ projects. Stay tuned for more of the same!

